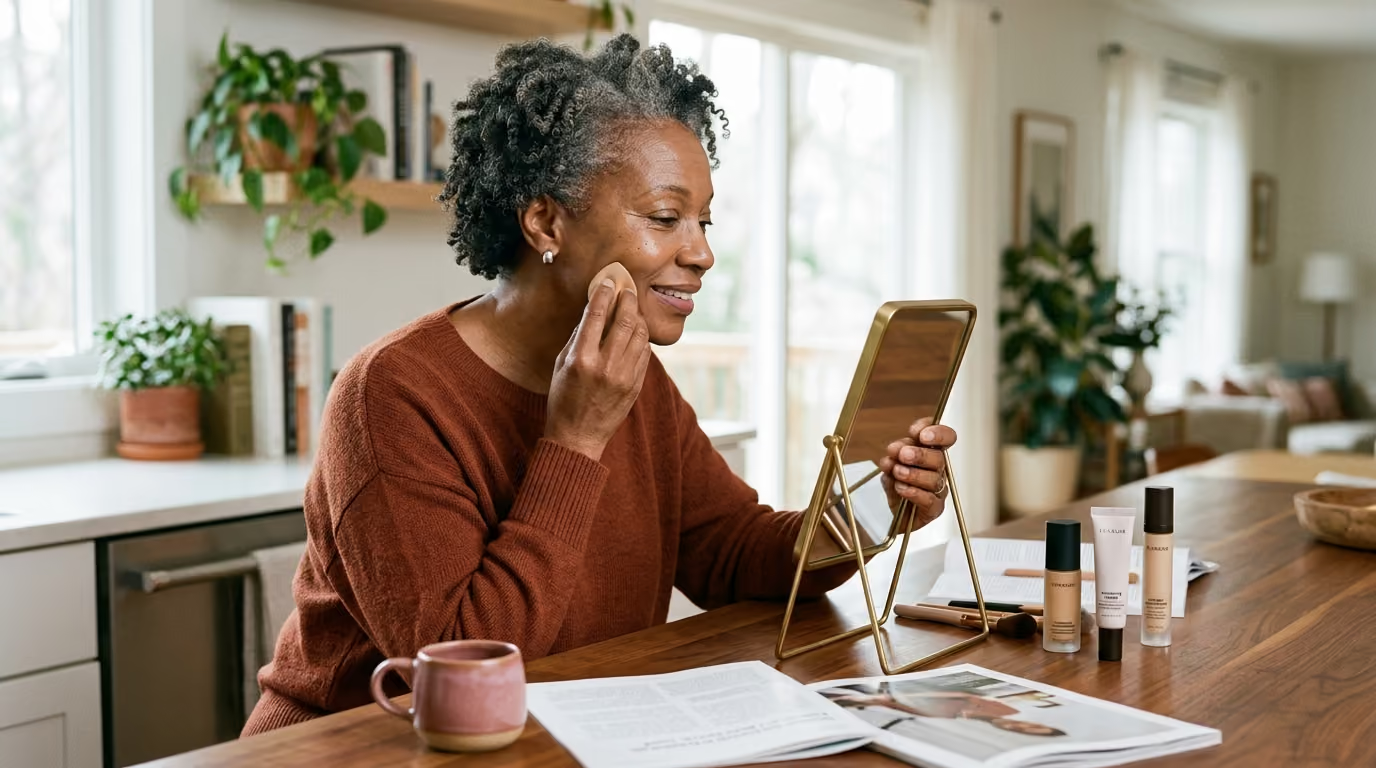

Flawless midlife makeup application begins with targeted prep and evidence-based techniques that flatter natural texture, manage dryness, and restore daily cosmetic confidence.





You sit down in front of the mirror with a foundation you have used for ten years. You apply it the same way you always have, using the same brush and the same amount of product. Within twenty minutes, the pigment settles into fine lines around your mouth, clings to dry patches on your cheeks, and appears strangely separate from your skin.
This sudden shift is common among women in their forties, fifties, and sixties. When familiar products stop behaving predictably, the standard commercial response is to sell anti-aging promises. You are told to buy dewy foundations, discard every shimmer eyeshadow, or purchase heavy primers designed to fill in pores.
The reality of midlife skin is far more nuanced. Skin does not suddenly become a uniform surface that requires total concealment. Menopause-related hormonal shifts alter hydration, barrier resilience, dermal thickness, and sebum production.
Understanding how these physical changes alter light reflection and product performance lets you adapt your technique. Makeup remains an optional creative choice for color, definition, and self-expression rather than a requirement to hide your age.
Midlife skin experiences physiological changes driven by a combination of chronological aging, cumulative sun exposure, and shifting reproductive hormones. Clinical dermatology reviews establish that estrogen plays an active role in maintaining cutaneous health. It influences dermal fibroblasts, stimulates collagen production, and supports the extracellular matrix.
During perimenopause and menopause, declining estrogen levels directly alter the skin's structural integrity. Dermatology research indicates that women may lose approximately 30 percent of dermal collagen during the first five years following menopause. After this initial drop, collagen content continues to decrease at an estimated rate of roughly 2 percent each year for the next two decades.
Skin thickness also decreases in the postmenopausal years, with research measuring an average reduction of 1.13 percent annually. Dermal elasticity declines at a rate of approximately 1.5 percent per year. These physiological shifts change how topical cosmetics interact with the facial surface.
Hormonal changes also affect surface hydration and barrier function. Estrogen decline is associated with reduced levels of hyaluronic acid and glycosaminoglycans within the dermis. These molecules are responsible for holding water in the tissue.
At the same time, shifting androgen levels can lead to a decrease in sebum production from the sebaceous glands. When natural oils drop alongside water-holding capacity, the stratum corneum experiences increased transepidermal water loss. The surface becomes drier, less supple, and more vulnerable to environmental irritation.
These biological changes explain why a heavy foundation that once looked seamless can suddenly look patchy. Thinner skin has less natural bounce, while lower moisture levels cause pigments to cling to microscopic flakes. These facts do not mean your skin is failing. They simply show that your skin surface requires different support, lighter textures, and gentler handling.
Skin does not follow a single path during midlife. Chronological age alone does not dictate whether you have dry, oily, combination, or reactive skin. Understanding the distinct processes taking place across different facial zones helps you make practical choices about cosmetics.
It is helpful to clarify the reproductive stages that influence skin physiology. Perimenopause is the transitional window when ovarian hormone production fluctuates unpredictably. You might experience oily breakouts one month and dry, tight skin the next as estrogen and progesterone shift.
Menopause is confirmed retrospectively after twelve consecutive months without a menstrual period. The years that follow are termed postmenopause. During postmenopause, systemic estrogen levels settle at a lower baseline, leading to more consistent structural thinning and reduced sebum production.
You can learn more about these broader transitions through our guides on hormonal changes during perimenopause and menopause. Recognizing which phase you are navigating helps set realistic expectations for skin behavior.
Many midlife makeup difficulties stem from confusing dry skin with dehydrated skin. Dry skin is a skin type characterized by low sebum production. It lacks lipids, feels rough to the touch, and often requires richer emollient creams to seal the surface.
Dehydrated skin is a temporary condition characterized by low water content in the stratum corneum. Dehydration can happen to any skin type, including naturally oily skin. It often produces fine surface crinkles, superficial tightness, and an uneven base where makeup absorbs rapidly in some spots and pills in others.
Menopausal skin frequently experiences both conditions simultaneously. When the lipid barrier is compromised, water evaporates rapidly. Applying a heavy, drying foundation over dehydrated skin pulls remaining moisture away, leaving the pigment looking cakey.
Texture is a broad descriptive term rather than a single flaw. In midlife, facial texture includes a wide range of normal anatomical features:
Makeup cannot level out physical relief, nor should it be expected to. Foundations and concealers modify color, tone down redness, and diffuse contrast. When products are applied too heavily over uneven texture, they highlight the very contours they were intended to disguise.
Lower estrogen levels and reduced lipid synthesis leave the skin barrier more vulnerable. Transepidermal water loss increases, making the nerve endings near the surface more reactive to environmental stressors. Ingredients you tolerated easily in your thirties may begin to cause stinging, redness, or contact irritation.
Cosmetic formulations with heavy synthetic fragrances, drying alcohols, or strong botanical extracts can trigger sudden reactivity. Dermatological conditions like rosacea and eczema also become more prevalent or more easily aggravated during midlife. Approaching makeup with an awareness of barrier preservation prevents uncomfortable reactions.
The way makeup wears across an eight-hour day depends heavily on the preparation sequence underneath it. When skin is dry or structurally thin, applying foundation directly to an unprepared surface guarantees uneven adhesion. Proper skin preparation focuses on gentle cleansing, barrier support, and adequate dry-down time.
Morning cleansing should preserve the natural lipids your skin produced overnight. If your skin feels tight or dry when you wake up, a splash of lukewarm water or a gentle lotion cleanser is sufficient. Avoid hot water, stiff washcloths, and aggressive foaming agents containing harsh sulfates.
Dermatology guidelines for reactive skin emphasize low-friction washing. Work the cleanser gently with your fingertips and pat your skin dry with a soft towel. Leaving the skin slightly damp creates an ideal canvas for your hydrating products.
Moisturizer serves as the physical interface between your skin and your cosmetic pigments. Apply your moisturizer while the skin is still slightly damp from cleansing to lock in hydration. Look for formulations containing proven humectants and barrier-replenishing ingredients:
Allow your moisturizer three to five minutes to settle into the skin before adding subsequent layers. If you apply foundation over wet moisturizer, the pigments slide around, streak, and separate.
Daily photoprotection remains essential for preventing further collagen degradation and hyperpigmentation. The American Academy of Dermatology recommends a broad-spectrum sunscreen with an SPF of 30 or higher every day. Apply your sunscreen as a dedicated step after your moisturizer has absorbed.
Makeup formulas that contain SPF rarely offer adequate sun protection on their own. Most people apply only a fraction of the cosmetic product required to reach the labeled protection rating.
Mineral sunscreen filters like zinc oxide and titanium dioxide are often well tolerated by reactive or rosacea-prone skin. Let your sunscreen form an even, dry film on the skin for several minutes before starting your makeup application.
Primers are optional tools designed for specific mechanical tasks rather than mandatory steps. Adding too many skincare and cosmetic layers increases the likelihood of pilling. Use a primer only if you have a specific issue you want to address:
Apply a small, pea-sized amount of primer only to the specific zones that require assistance. Keep the perimeter of the face free of excess layers.
Foundation in midlife is most successful when treated as an optical filter rather than a mask. Heavy, full-coverage formulas applied uniformly across the entire face create a flat look that exaggerates surface texture. Modern foundation techniques focus on matching finish, coverage, and placement to your individual skin condition.
Beauty marketing often promotes dewy foundations as the only choice for midlife skin. While luminous finishes help dry skin look comfortable, excessive shine reflects light directly off raised bumps, enlarged pores, and rough texture. Ultra-matte foundations control oil but can cling to dry patches and settle into lines.
A satin or natural finish offers a balanced middle ground. Satin formulas reflect a soft, diffused light without looking wet or greasy. They provide enough flexibility to move naturally with facial expressions without cracking around the mouth or eyes.
If you have combination skin, consider using finish zoning. Apply a satin foundation across your cheeks, and gently pat a tiny amount of translucent powder across your nose and chin to control unwanted shine.
Coverage should be applied based on contrast rather than age. Instead of blanketing the whole face in opaque pigment, identify the specific areas that draw your eye. For most women, this means addressing redness around the nostrils, broken capillaries on the chin, or sun spots on the upper cheeks.
This technique keeps the outer contours of your face looking natural and fresh. It prevents product buildup near the hair and jawline where skin tends to be drier.
The tool you choose affects how much product stays on the skin and how it settles over texture. Different tools serve different needs:
If your foundation begins to separate or look cakey during the day, do not add more makeup. Lightly mist your face with water or a simple hydrating spray, then press the surface with a clean, damp sponge to redistribute the existing pigment.
Concealer formulas contain a higher concentration of pigment than standard foundations. Because the skin around the eyes is the thinnest on the body, heavy concealer application easily leads to creasing, flaking, and visual heaviness. Strategic placement and color correction provide smooth coverage with minimal product.
Under-eye darkness in midlife is often caused by a combination of vascular color, structural hollows, and thinning skin. Applying a thick, pale concealer across the entire eye area creates a gray, pasty appearance that emphasizes bags and fine lines.
A color-correcting approach delivers better results with far less product:
This targeted method corrects the perceived shadow without forming an opaque layer over delicate skin.
For dark spots, broken capillaries, or active blemishes, use a pinpoint concealing method. Choose a creamy, high-coverage concealer that matches your exact skin tone rather than a lighter shade.
Using a fine, pointed brush, place a microscopic dot of concealer directly onto the center of the spot. Let the product sit for thirty seconds to build adhesion, then use the pad of your clean finger to tap the outer edge until it melts into your foundation. This keeps the coverage localized without building up excess makeup on the surrounding skin.
Powder is often viewed with caution by midlife women, but it remains a valuable tool for locking makeup in place. The key is choosing the right formula and applying it with precision.
Avoid heavy talc-based powders or dense pressed compacts that absorb natural oils aggressively. Instead, select finely milled, translucent loose powders formulated with silica or mica. These powders provide slip and diffuse light without creating a dry, chalky cast.
Apply powder with a small, tapered eyeshadow brush rather than a large powder puff. Lightly dust the product only across areas prone to oil breakthrough or smudging, such as the sides of the nose, center of the chin, and upper eyelids. Leave the cheeks, forehead, and outer face unpowdered to preserve natural luminosity.
Color cosmetics bring vitality, structure, and definition back to the face. As skin loses natural tone and hormonal changes affect microcirculation, well-placed blush and bronzer restore dimension. Choosing suitable textures and placement methods helps maintain a modern, fresh look.
Both cream and powder blushes have a place in a midlife cosmetic routine. Your choice should depend on your skin type, climate, and personal preference:
If you enjoy the luminous finish of creams but need long-lasting wear, try layering. Apply a small amount of cream blush over your foundation, then set it lightly with a sheer dusting of matching powder blush.
Traditional makeup advice often instructs women to smile and apply blush directly to the apples of their cheeks. When your face relaxes, however, that placement drops lower on the cheek, which can pull the face downward visually.
A more lifting placement involves applying blush slightly higher along the cheekbone. Start at the center of the cheek, directly below the pupil, and blend the color upward and back toward the hairline and temples. Keep the color at least two fingers away from the sides of your nose to maintain open space in the center of the face.
Bronzer adds warmth and balances tone across the face and neck. Choose a matte or soft satin bronzer that is one to two shades deeper than your natural skin tone. Avoid muddy orange tones or heavy glitter particles.
Apply bronzer where the sun naturally hits your face:
Blending bronzer downward onto the neck helps merge any color discrepancies between the face and chest.
Highlighters use light-reflecting particles to draw attention to specific facial high points. Because shine highlights surface irregularities, highlighters require careful placement.
Avoid applying frosted or glittery highlighters over enlarged pores, dry flaking patches, or prominent crow's feet. Instead, select liquid or balm-style highlighters that provide a soft, healthy sheen. Place a small tap of product on the highest point of the cheekbone, beneath the arch of the brow, and on the Cupid's bow of the lip.
The eye area undergoes distinct structural changes during midlife. Eyelid skin loses elasticity and becomes thinner, resulting in hooded lids, creasing, and altered lash lines. Hormonal shifts can also lead to sparse eyebrows, lighter lashes, and increased tear film sensitivity. Adapting your eye makeup ensures comfortable wear and clean definition.
Hooded or creased eyelids can cause eyeshadow to smudge, transfer, or disappear throughout the day. Applying a thin, matte eyeshadow primer over clean lids creates an even base and prevents natural oils from breaking down your makeup.
When selecting eyeshadows, focus on soft matte, satin, and micro-shimmer textures:
Stark, liquid cat-eye liner can look harsh against softer eyelid contours and is difficult to apply over textured skin. Soft pencil and gel liners offer superior control and create a flattering frame for the eyes.
Try the tightlining technique to enhance lash density without taking up lid space. Gently press a soft, waterproof brown or charcoal pencil directly into the roots of your upper lashes from underneath.
For the upper lid, sketch a soft line along the lash roots and smudge it lightly with a small brush before it sets. Softening the line creates a diffused edge that forgives skin unevenness.
Tearing and watery eyes are common midlife complaints, often related to fluctuating hormones, dry eye syndrome, or allergy sensitivities. Standard waterproof mascaras resist water but require harsh scrubbing and heavy oil cleansers to remove, which pulls delicate skin.
Tubing mascaras offer an effective solution. These formulas contain polymers that wrap around each individual lash in water-resistant tubes. They do not smudge, flake, or run during watery eye flare-ups, yet they slide off effortlessly with warm water and light fingertip pressure at night.
The U.S. Food and Drug Administration provides clear safety guidelines for eye cosmetics:
Eyebrows often thin out during perimenopause and postmenopause, particularly at the outer tails. Well-shaped brows frame the eyes and bring balanced structure to your facial features.
Instead of drawing harsh, solid lines with a dark pencil, build dimension gradually:
Embracing gray brow hairs with a soft taupe or cool ash-toned brow gel creates a refined, modern appearance that complements your changing hair color.
The lips naturally lose volume, hydration, and definition in midlife as collagen levels decline. Fine vertical lines can develop around the vermilion border, causing creamy lipsticks to bleed or feather. Thoughtful lip preparation and product selection ensure comfortable, long-wearing color.
Lips lack sebaceous glands, making them vulnerable to flaking and environmental chapping. Start your makeup routine by applying a rich, fragrance-free lip balm containing shea butter, lanolin, or ceramides. Let the balm absorb while you apply the rest of your makeup.
Before applying your lip color, gently blot away any excess balm with a tissue. If you leave a slippery layer of balm on the lips, your lip liner and lipstick will fail to adhere properly.
Lip liner is an essential tool for defining soft edges and preventing color migration:
Extremely matte liquid lipsticks dry down into a rigid film that emphasizes lip lines and causes uncomfortable tightness. High-shine glosses feel comfortable but can migrate easily beyond the lip border.
Satin, velvet, and tinted balm formulas offer an ideal balance of hydration, color payoff, and wear time. Creamy formulas with nourishing oils provide comfortable coverage that wears away evenly without flaking.
If you enjoy bright or bold colors, wear them with confidence. A vibrant berry, rose, or classic red lipstick brings energy to the face. Pair bold lip colors with a fresh, sheer complexion and simple eye definition to keep the overall look balanced.
How you take your makeup off at night is just as important as how you apply it in the morning. Aggressive wiping, harsh makeup wipes, and hot water strip the skin barrier, worsening dryness and accelerating sensitivity. A low-friction removal routine protects your skin integrity and prepares your face for nighttime rest.
A gentle double cleansing routine effectively dissolves waterproof sunscreens, long-wear pigments, and sebum without mechanical friction:
Once makeup is removed, apply your nighttime skincare products immediately to damp skin. Support barrier repair overnight with rich creams containing ceramides, fatty acids, and soothing ingredients like colloidal oatmeal or panthenol.
If you use active treatments such as retinoids or exfoliating acids, apply them cautiously. You can explore our extensive collection of midlife skin and aesthetic aging articles for deeper insights into managing targeted active ingredients alongside barrier health.
Outdated beauty rules and aggressive marketing often create unnecessary confusion for midlife women. Recognizing these common misconceptions helps you simplify your routine and focus on techniques that work.
While estrogen decline reduces overall sebum production, many women continue to experience combination skin, an oily t-zone, or adult acne during perimenopause. Treating your entire face with heavy oils can lead to clogged pores and makeup slippage across the nose and forehead. Customize your products by zone rather than assuming your skin is uniformly dry.
Dewy foundations reflect light broadly, which can emphasize enlarged pores, skin texture, and fine bumps. A satin or natural-matte finish offers a balanced alternative that stays in place while keeping your skin looking comfortable and smooth.
The idea that mature women should never wear shimmer is an outdated cosmetic rule. Finely milled satin and micro-shimmer formulas bring light and dimension to the eyes and cheekbones. The key is avoiding large, chunky glitter particles that settle unevenly into eyelid texture.
Foundation modifies color, not physical relief. Applying heavy layers of high-coverage foundation fills into lines and creases, making skin folds more noticeable. Sheer, buildable layers maintain natural skin movement and look far fresher in daylight.
Heavy layers of drying talc powder settle into lines, but a light dusting of finely milled translucent silica powder controls shine and keeps makeup in place. Strategic powder placement on the t-zone prevents midday smudging while leaving your cheeks naturally luminous.
The American Academy of Dermatology highlights that "unscented" products often contain masking fragrances designed to neutralize chemical odors. For sensitive or reactive midlife skin, always choose products specifically labeled "fragrance-free" to minimize the risk of contact dermatitis.
Because midlife skin features varied textures and hydration levels across different areas, applying a single product uniformly rarely works. Here is how to handle common skin scenarios effectively.
Makeup is a deeply personal practice with diverse psychological and aesthetic meanings. Research on cosmetics and self-esteem reveals complex relationships. Studies indicate that makeup usage can influence self-presentation, social confidence, and body image, but these effects vary widely among individuals.
Some women find that applying makeup serves as an enjoyable morning grounding ritual, offering a creative space for color experimentation and personal care. Other women feel entirely confident wearing no makeup at all, preferring a streamlined skincare routine.
Midlife offers an opportunity to release rigid societal rules about anti-aging and visual conformity. Makeup does not need to serve as a tool to recreate how your face appeared decades ago. It can simply be a medium to highlight your favorite features, express your personal aesthetic, and feel comfortable in your skin today.
Whether you enjoy a bold red lip, a soft neutral eye, or a bare, moisturized face, the choice belongs entirely to you. You can read more about self-image, autonomy, and midlife growth in our resources on personal confidence and reinvention.
While adapting your makeup technique solves most cosmetic challenges, certain skin changes require professional clinical evaluation rather than cosmetic coverage. Cosmetics should never be used to conceal active, painful, or spreading dermatological conditions.
Consult a board-certified dermatologist or healthcare provider if you notice:
A medical professional can provide accurate diagnoses for conditions such as rosacea, perioral dermatitis, contact allergies, or hormonal acne. Once clinical issues are properly managed, cosmetics can be safely reintroduced to support your routine.
Navigating the beauty industry requires a clear boundary between established dermatological facts and commercial claims. While the hormonal biology of menopausal skin is well-documented in scientific literature, cosmetic product performance relies largely on formulation chemistry and personal technique.
Dermatology studies confirm that estrogen decline reduces collagen synthesis, skin thickness, and surface hydration. However, there are no robust clinical trials proving that foundations marketed specifically for mature skin deliver superior long-term results over standard hydrating formulas.
Terms like "dermatologist-tested," "clean," "hypoallergenic," and "collagen-boosting" on makeup packaging are marketing descriptors rather than standardized medical claims. Cosmetic products cannot replace dermal collagen loss or alter intrinsic skin anatomy.
Recognizing these distinctions prevents unrealistic expectations. Approaching makeup as a surface-level tool for color, comfort, and contrast lets you choose products based on practical performance rather than marketing promises. For comprehensive, evidence-informed guidance on navigating midlife changes, explore our full library of midlife health resources.
Makeup for midlife skin is most successful when it works with your changing biology rather than attempting to conceal it. By prioritizing barrier hydration, applying thin layers of coverage where needed, and choosing comfortable finishes, you can achieve a look that feels authentic and confident.
Revisit this guide whenever you experience seasonal shifts in skin dryness, notice new sensitivities to your everyday products, or wish to refresh your makeup routine with practical, research-aware techniques.
Adjusting your makeup is an evolving process that should always serve your personal comfort, style, and peace of mind.

Follow Refemina for research-led resources on hormonal change, strength, metabolism, nutrition, skin, intimate wellbeing and confidence through midlife.


Keep learning about the changes that shape energy, strength, confidence and wellbeing through midlife.
Explore Resources